Microsoft SQL Server 2025 introduces the ability to integrate with various AI embedding models to perform vector searching. To practice these capabilities using the demonstrations provided by Microsoft on the AdventureWorks database, we need to first setup a secure environment.
If you do not have an instance of SQL Server 2025, follow this step-by-step guide. Next, we will setup Ollama that will allow us to run embedding models locally completely on-premises with no external dependencies, making it great for development, testing, and privacy-sensitive scenarios.
What is Ollama?
Ollama is a lightweight, open‑source tool used for running large language models (LLMs) locally on your own computer, without needing cloud services. This makes it ideal for privacy‑sensitive use cases. Ollama allows developers, researchers, and hobbyists to download, manage, and run modern AI models to your local machine, giving you privacy, offline capability, and full control over how models are executed.
What is Nginx?
Ollama itself exposes a raw HTTP API on port 11434, but it has no built‑in authentication or encryption, SQL Server 2025 requires HTTPS connectivity to any AI models. Nginx fills this gap to act as a reverse proxy and a security gatekeeper. We will also need to use the MKCERT tool to create a certificate to secure that communication on HTTPS.
Setting up Ollama on Windows.
You’ll need to start by downloading and installing Ollama.
- Sign into https://ollama.com/
- Select Download.
- Select Windows and then Download for Windows.
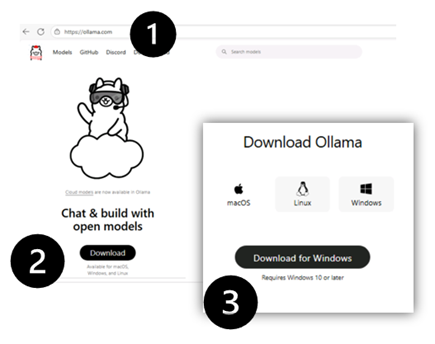
- Once the download is complete, select Show in folder.

- Double-click on OllamaSetup and then click Install.
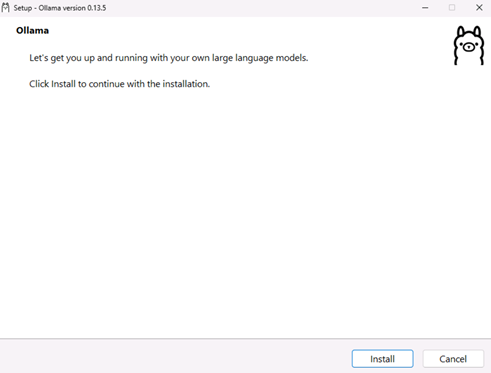
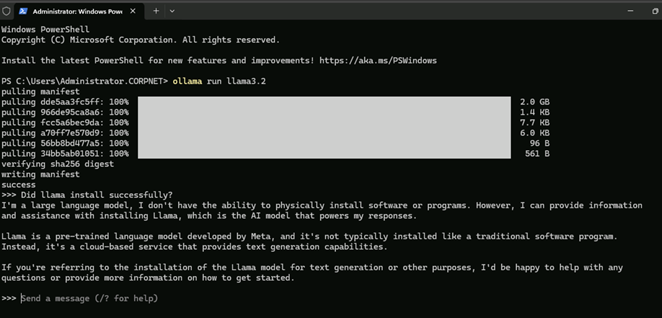
- Once install is complete, you will see the graphical user interface where you can select a model and begin asking questions. However, we want to use the llama3.2 model to use with SQL Server 2025. Close the Ollama dialog box and your browser window.
- We need to use PowerShell to set up llama3.2.
- Rick-click on the Windows Start menu and select Terminal (Admin).
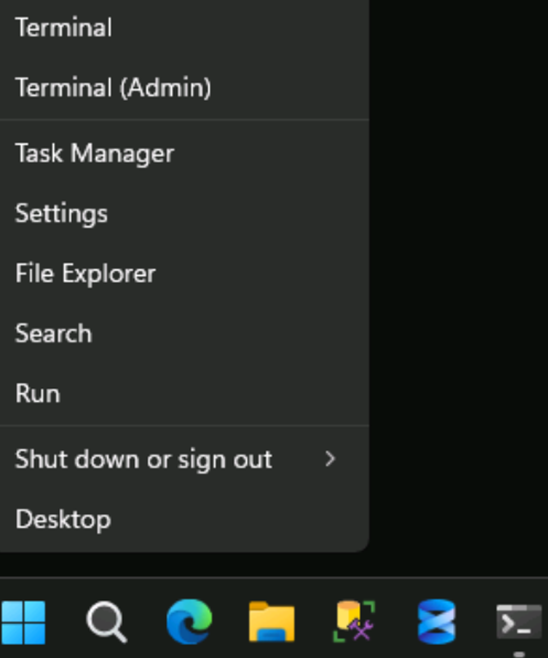
- In the PowerShell window type the following:
Ollama run llama3.2- The installation process will take 5 minutes. Once completed, type a question to verify that Ollama is running correctly.
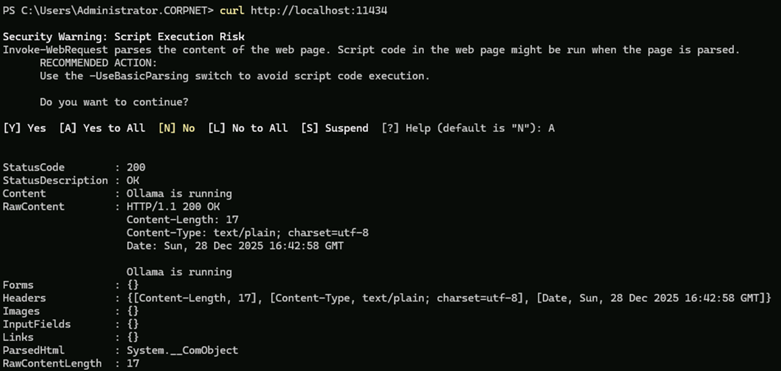
- Let’s confirm our connectivity outside of Ollama. First, we need to exit out of the application.
- At the prompt type the following to exit.
/bye- Now type the following to verify connectivity.
curl http://localhost:11434- If you get a Security Warning, select A.
- Next, we want to pull an embedding model down to use with the Vector data type in SQL Server 2025. There are several that you can choose from: We will use the mxbai-embed-large model to match the model used with the demonstrations.
- Run the following command:
ollama pull mxbai-embed-large
Using MKCert to create certificates for secure connectivity.
As mentioned above, Ollama uses the unsecure HTTP port 11434, however, SQL Server 2025 requires HTTPS connectivity. To secure the connection, we will use the MKCERT tool to create a certificate and then Nginx to provide the secure reverse proxy.
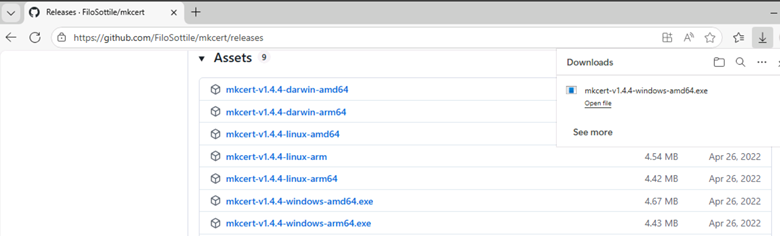
You’ll need to start by downloading and installing the MKCert tool.
- Go to https://github.com/FiloSottile/mkcert/releases
- Under Assets, select the version for your operating system. We will be using mkcert-v1.4.4-windows-amd64.exe
- Select Open File from the Downloads dialog box. It should take 30 seconds to install the MKCert application.
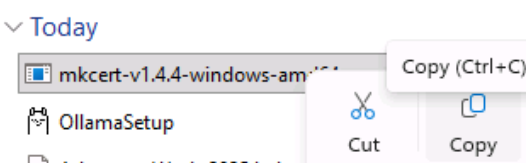
- Once you have downloaded the mkcert-v1.4.4-windows-amd64.exe file, we need to move it to a location that will be easily accessible from PowerShell.
- Click on Show in Folder to open the Downloads folder.
- Right-click on the file and select Copy.
- Navigate to your C: drive, right-click and select Paste. (It is better to copy to a folder that is not on your C: drive but remember where you saved it. Close File Explorer.
- Return to your PowerShell Window.
- Type the following to navigate to your C: drive. (Or navigate to where you saved the mkcert installation file).
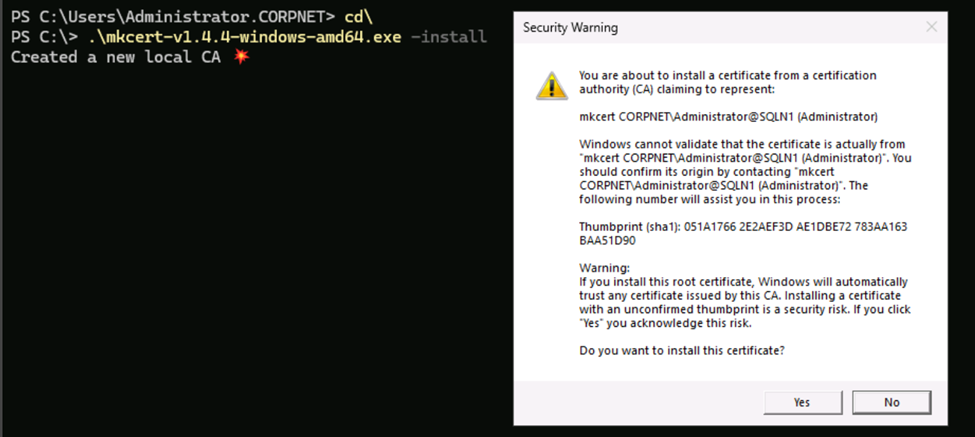
cd\- Type the following to install the mkcert application.
.\mkcert-v1.4.4-windows-amd64.exe -install- When the Security Warning dialog box opens, click Yes to install the certificate.
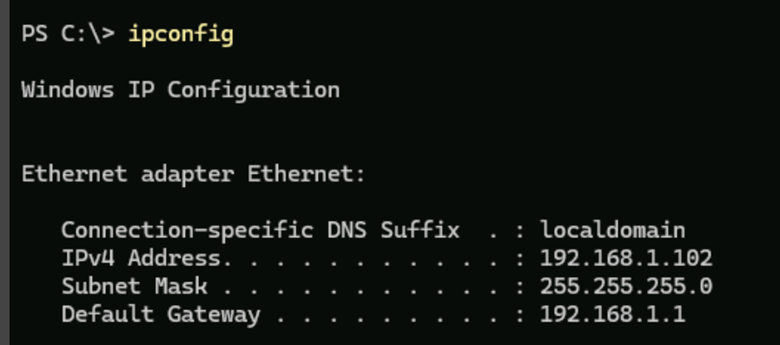
- Now we need to create a certificate for our windows machine. We first need to find our IP address by typing IPCONFIG in the PowerShell window. My IP address in this example is 192.168.1.102.
- To create a certificate for our local IP address, type the following:
.\mkcert-v1.4.4-windows-amd64.exe 192.168.1.102 localhost 127.0.0.1 ::1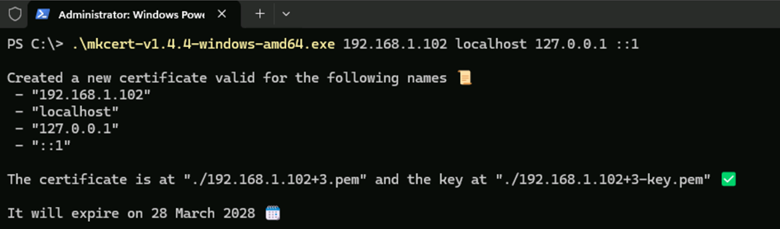
Using Nginx to create a secure proxy to connect to SQL Server 2025.
Now that we create the certificate, we need to install and setup the Nginx application to provide the secure reverse proxy.
You’ll need to start by downloading and installing the application.
- Go to https://nginx.org/
- On the right-hand side of the screen click Download.
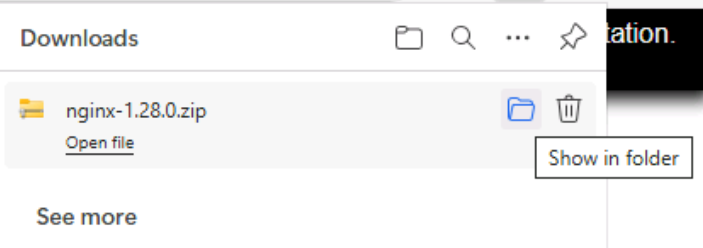
- Select the most recent Stable version. In our case we will use nginx/Windows-1.28.0

- Once you have downloaded the nginx-1.28.0.zip file, we need to move it to a location that will be easily accessible from PowerShell.
- Click on Show in Folder to open the Downloads folder.
- Right-click on the file and select Copy.
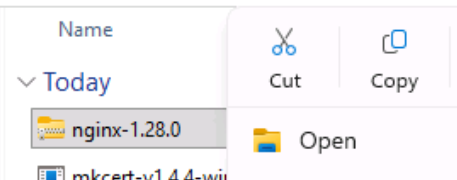
- Navigate to your C: drive, right-click and select Paste. (It is better to copy to a folder that is not on your C: drive but remember where you saved it. Close File Explorer.
- Right click on nginx-1.28.0 and select Extract All… and then click Extract.
- Double click the nginx-1.28.0 folder and create a new folder called Certs.
- Navigate to the C: drive, right-click the two certificates that were previously created (They have the .pem file extensions) and select Cut.
- Navigate back to the nginx-1.28.0 folder and paste the two certificates into the Certs folder.

- Finally, we need to change the Nginx configuration file to use the certificates.
- Navigate to the C:\nginx-1.28.0\nginx-1.28.0\conf folder.
- Right-click on nginx.conf file and click on Open With.
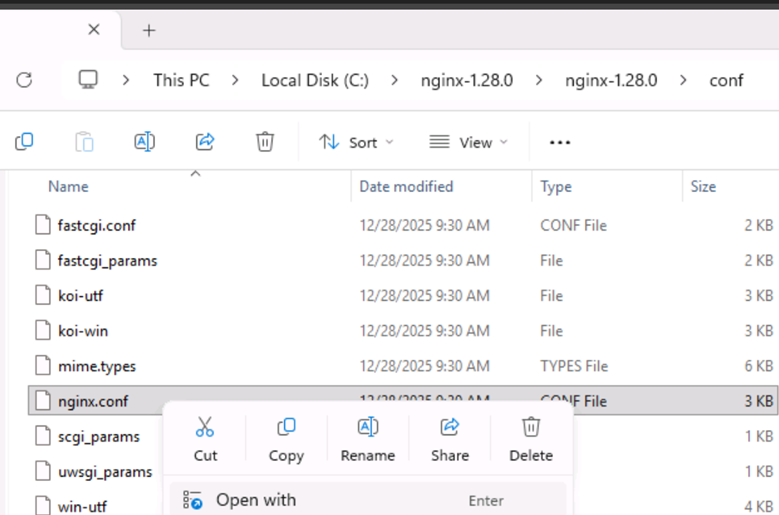
- Select Notepad to modify the file.
- Locate the line that starts with http {
- Delete everything from there to the end of the file.
- Paste in the following code: Make sure to replace with your IP Address and certificates.
http {
    server {
        listen 443 ssl;

        server_name <YOUR IP ADDRESS HERE>;
        ssl_certificate      ../certs/<YOUR CERT FILENAME HERE>.pem;
        ssl_certificate_key  ../certs/<YOUR CERT FILENAME HERE>-key.pem;

        location / {
            proxy_pass http://localhost:11434;
            proxy_http_version 1.1;
            proxy_set_header Host $host;
            proxy_set_header X-Real-IP $remote_addr;
            proxy_set_header X-Forwarded-For $proxy_add_x_forwarded_for;
}}}- Make sure to save the nginx.conf file and close Notepad.
- Open PowerShell and type the following to return to the C: prompt if not already there.
cd\- Type the following to navigate to the Nginx folder.
cd nginx-1.28.0- Type the following to start the application.
start nginx-1.28.0 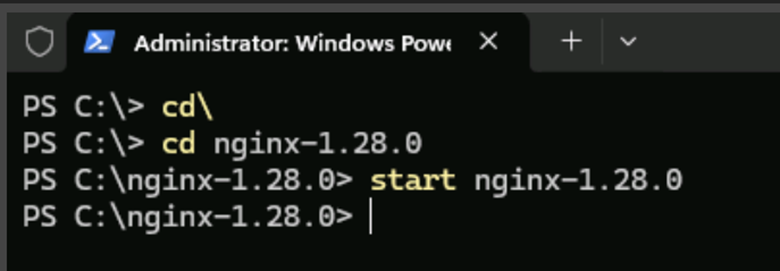
- When the file explorer window opens click on the Nginx.exe file to start the program.
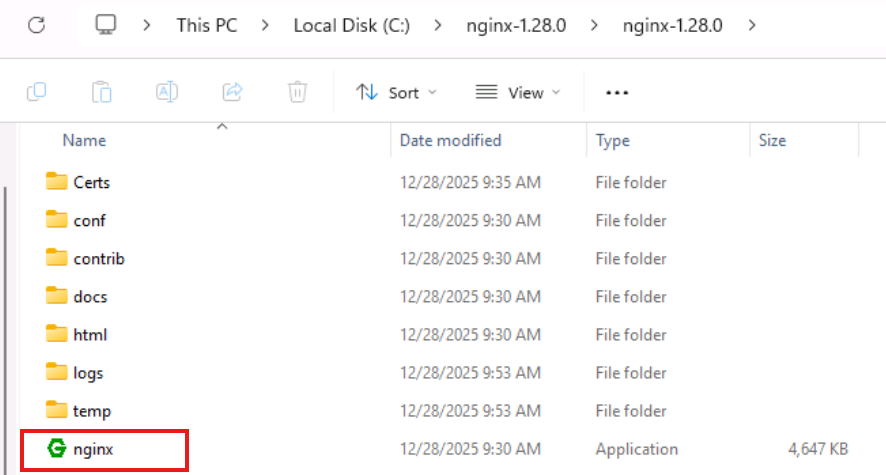
- Close the file explorer window.
- Verify you can still connect using HTTP by typing the following:
curl http://localhost:11434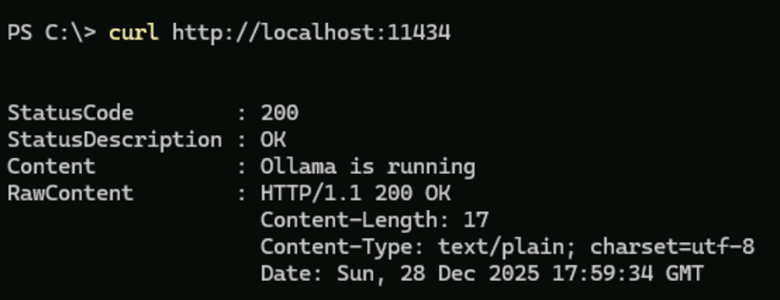
- Verify you can connect using HTTPS by typing the following:
curl https://localhost
- Verify that Ollama and embeddings are working by typing the following:
Invoke-RestMethod -Uri https://localhost/api/embeddings `
-Method Post `
-Body '{"model": "mxbai-embed-large", "prompt": "This is a test sentence to embed."}' `
-ContentType 'application/json'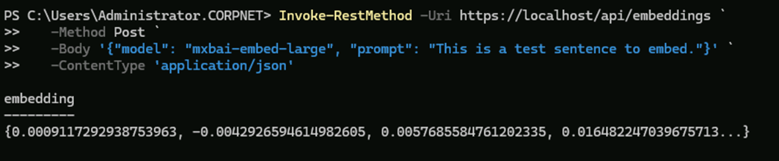
Optional for Virtual Environments
If you run into Error: MSG 31608 when trying to use the AI_GENERATE_EMBEDDINGS, you may have to import your root certificate into your virtual machine. (You will have to turn on hidden files to navigate to the rootCA.pem file.)
- Copy C:\Users\Administrator\AppData\Local\mkcert\rootCA.pem to somewhere on your VM.
- Click on the Windows Start menu and type certmgr in the search bar.
- Under Manage computer certificates, click Open.
- Expand Trusted Root Certification Authorities and right-click on Certificates.
- Select All Tasks and then Import…

- In the Wizard, click Next.
- Click the Browse button to navigate to where your copied the rootCA.pem file.
- You will want to change the “Field name:” field to *.*)

- Click Next to the end of the Wizard.
Conclusion
Setting up SQL Server 2025 to use local LLM embeddings requires establishing a secure HTTPS endpoint, and this document provides a clear, comprehensive walkthrough to achieve that. By combining Ollama for local model hosting, MKCERT for generating trusted certificates, and Nginx for secure proxying, developers can work with vector search capabilities entirely on-premises with full privacy and control. Now you are ready to practice using the demonstrations provided by Microsoft on the AdventureWorks database,
References
- Andy Yun: Practical AI in SQL Server 2025: Ollama Quick Start
- Anthony Nocentino: Getting Started with Vector Search in SQL Server 2025 Using Ollama
- Bob Ward: Vector Search with Ollama

Thanks for the detaile explanation and instructions
I ran into a minor issue when running ‘Invoke-RestMethod -Uri https://localhost/api/embeddings` .Error was ‘Invoke-RestMethod : Unable to connect to the remote server’.
When I modified it to ‘Invoke-RestMethod -Uri http://localhost:11434/api/embeddings ` it worked fine .
Just posting it in here if anyone else run into similar issue
If you run into this error, it is possible that Nginx was not started. In the file explorer window, navigate to C:\Nginx-1.28.0\ and click on the Nginx.exe file to start the program.