Protecting sensitive data doesn’t always require heavy encryption or complex application changes. Sometimes, you just want users to see less, without breaking queries or rewriting code. That’s exactly what Dynamic Data Masking (DDM) in SQL Server is designed to do.
In this post, we’ll walk through a complete, end-to-end example of Dynamic Data Masking, using a real SQL script to:
- Apply different masking functions
- Compare admin vs non-admin access
- Modify masks after table creation
- Remove masks when needed
- Override masking with the UNMASK permission
What Is Dynamic Data Masking?
Dynamic Data Masking limits the exposure of sensitive data at query time by masking it for non-privileged users.
- Data is not changed at rest
- Masking applies only to SELECT queries
- Privileged users (db_owner, sysadmin, or users with UNMASK) see full data
- Applications do not need to be modified
Create the Demonstration Database
We start by creating a dedicated demonstration database name DDM_Demo.
--Prepare for the Demo
USE MASTER
GO
DROP DATABASE IF EXISTS DDM_DEMO
GO
CREATE DATABASE DDM_DEMO
GO
USE DDM_DEMO
GO
Create a Table with Masked Columns
Next, we create a table that mixes masked and unmasked columns:
--Create a new table with data masks
CREATE TABLE EmployeePersonalData
(EmpID int NOT NULL PRIMARY KEY,
Salary int MASKED WITH (FUNCTION = 'default()') NOT NULL,
EmailAddress varchar(255) MASKED WITH (FUNCTION = 'email()') NULL,
VoiceMailPin smallint MASKED WITH (FUNCTION = 'random(1000, 9000)') NULL,
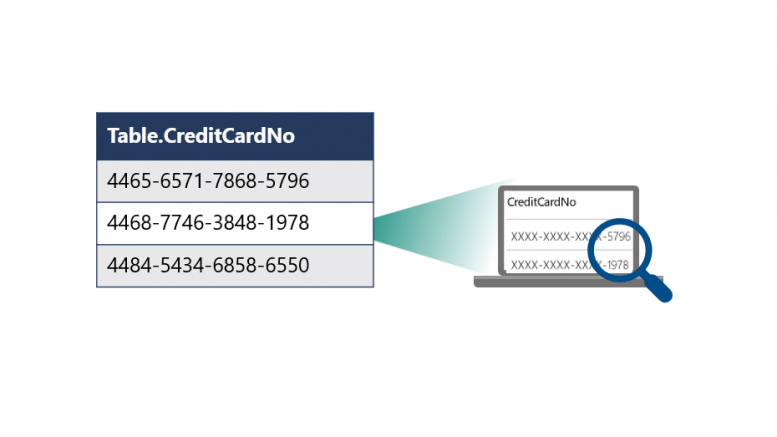
CompanyCard varchar(30) MASKED WITH (FUNCTION = 'partial(2,"XXXX",4)') NULL,
HomePhone varchar(30) NULL
);
GOMasking Functions Used
| Column | Masking Function | Behavior |
| Salary | default() | Masks numeric values (e.g., 0) |
| EmailAddress | email() | Preserves email format but masks content |
| VoiceMailPin | random(1000,9000) | Returns random values per query |
| CompanyCard | partial(2,”XXXX”,4) | Shows first 2 and last 4 characters |
| HomePhone | (none yet) | Initially unmasked |
Create a Low-Privilege User
To demonstrate the effect of masking, we create a test user with no login. The user is given only SELECT access to the table. No UNMASK permission is granted yet, so masking will apply.
--Create test user and grant permission
CREATE USER test_user WITHOUT LOGIN
GO
GRANT SELECT ON EmployeePersonalData TO test_user;
GO
Step 5: Insert Sample Data
We insert realistic data so the effects of masking are easy to see:
--Insert test data
INSERT EmployeePersonalData
(EmpID, Salary, EmailAddress, VoiceMailPin, CompanyCard, HomePhone)
VALUES (1,25000,'Jack@adventure-works.net',9991,'9999-5656-4433-2211', '234-5678'),
(2,35000,'Diane@adventure-works.org',1151,'9999-7676-5566-3141', '345-3142'),
(3,35000,'Manager@adventure-works.com',6514,'9999-7676-5567-2444', '456-7772')
Compare Admin vs Masked Results
Admin View (Unmasked)
Running the query as an administrator shows full data. People with the UNMASK permission, like sysadmins, will not apply Dynamic Data Masking.
SELECT * FROM EmployeePersonalData
Masked View (Low-Privilege User)
We now impersonate the test user:
EXECUTE AS USER = 'test_user'
SELECT * FROM EmployeePersonalData
REVERT
GO
At this point:

- Salary shows masked values
- Email addresses are transformed
- Personal Identification Numbers (PINs) return random numbers
- Credit card values are partially hidden
- HomePhone remains visible (for now)
Add a Mask to an Existing Column
Dynamic Data Masking can be added after table creation.
Here we mask the HomePhone column:
--Alter the home_phone_number column to add a mask
ALTER TABLE EmployeePersonalData
ALTER COLUMN HomePhone
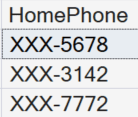
ADD MASKED WITH (FUNCTION = 'partial(0,"XXX-",4)');
GOVerify the New Mask
EXECUTE AS USER = 'test_user'
SELECT HomePhone FROM EmployeePersonalData
REVERT
GO
Only the last four digits remain visible.
Remove a Mask from a Column
Remove masks dynamically when they’re no longer required:
--Remove the mask from the salary column
ALTER TABLE EmployeePersonalData
ALTER COLUMN Salary
DROP MASKED;
GO
Verify Salary Is No Longer Masked
--Show that salary is now unmasked
EXECUTE AS USER = 'test_user'
SELECT Salary FROM EmployeePersonalData
REVERT
GO
Salary is now fully visible because the mask no longer exists.

Grant the UNMASK Permission
The UNMASK permission allows users to see all masked data without changing column definitions:
GRANT UNMASK TO test_user;Verify UNMASK Behavior
EXECUTE AS USER = 'test_user'
SELECT * FROM EmployeePersonalData
REVERT
GO
All columns now return unmasked values, including those with masking functions defined.

Clean Up Demonstration
Finally, clean up by removing the demo table:
DROP TABLE EmployeePersonalData;
GO
USE MASTER
GO
DROP DATABASE DDM_DEMO;
GO
When Should You Use Dynamic Data Masking?
Apply Dynamic Data Masking when you need to:
- Reducing exposure in non-production environments
- Supporting least-privilege access models
- Masking sensitive fields for reporting and analytics users
- Rapid protection without schema redesign
When Not to Use It
- It is not a security boundary
- Does not protect data from privileged users
- Does not encrypt data
Final Thoughts
Dynamic Data Masking is simple, powerful, and often underused. Ultimately, with just a few T-SQL statements, you can dramatically reduce accidental data exposure; especially in dev, test, and reporting scenarios.


Be the first to comment on "Dynamic Data Masking in SQL Server"