How do we work with Transactions and Errors in SQL Server? What is the difference between Auto-Commit and Explicit Transactions? How do we implement Error Handling with Transactions?
Setting up the Accounting.BankAccounts table
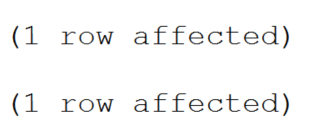
In a previous post we discussed how to work with batches where we created a table named Accounting.BankAccounts and inserted two records. When the two records were inserted, we received the following message.

Using Auto-Commit Transactions
The two separate (1 row affected) messages happened because while the two statements were in the same batch, there were two separate auto-commit transactions.
Let’s check the bank balance of the two bank customer’s accounts.
SELECT * FROM Accounting.BankAccounts
Auto-Commit Transactions and Multiple Updates
However, what if we wanted to make sure that both statements either had to be successful or neither statement would commit to the database?
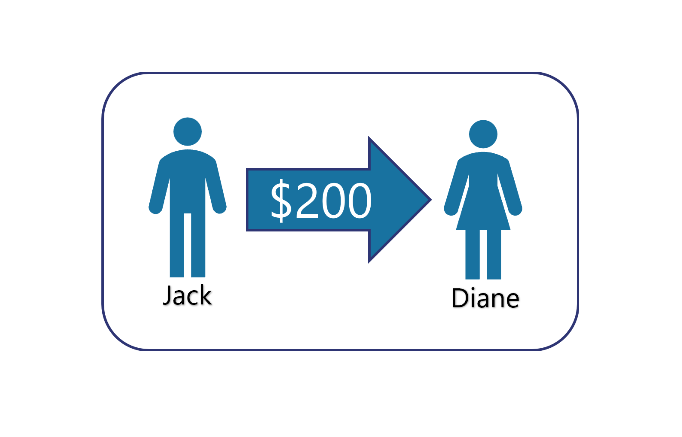
An example of this would be if Jack had hired Diane to work on his website. Diane sends an invoice of $200. We would need to transfer $200 from Jack’s account into Diane’s account.

We run the following Update statements to transfer $200 from AcctID 1 into AcctID 2.
UPDATE Accounting.BankAccounts
SET Balance -= 200
WHERE AcctID = 1

UPDATE Accounting.BankAccounts
SET Balance += 200
WHERE AcctID = 2
This code would run successfully, but we would still receive the message that each statement was successful. This is because they are still two separate auto-commit transactions. This is fine as long as there are not any runtime errors.

Check the bank balance of the two customer’s accounts again. Notice $200 was transferred successfully.
SELECT * FROM Accounting.BankAccounts
Runtime Errors only Terminate Statements not Batches
In the post on working with batches, we demonstrated that syntax errors will terminate the entire batch. However, runtime errors will only terminate individual statements.
So, what if we made a runtime error in one of the statements? For example, in the first update statement we accidentally typed 2/0 instead of $200 which would give a divide by zero run-time error. (Error message displayed below)
UPDATE Accounting.BankAccounts
SET Balance -= 2/0
WHERE AcctID = 1

UPDATE Accounting.BankAccounts
SET Balance += 200
WHERE AcctID = 2
Notice that the first update statement failed, but the second update statement still ran successfully. This would lead to inconsistent data in our tables where $200 had been added to the Diane account without removing it from the Jack account.

Using SET XACT_ABORT ON with Auto-Commit Transactions
One way we could handle this error would be to use the SET XACT_ABORT ON statement. This statement would terminate the entire transaction once the error was reached and cancel the rest of the batch.
SET XACT_ABORT ON
	UPDATE Accounting.BankAccounts
	SET Balance -= 2/0
	WHERE AcctID = 1

	UPDATE Accounting.BankAccounts
	SET Balance += 200
	WHERE AcctID = 2
Notice no money was transferred as SET XACT_ABORT ON terminated the entire transaction.

However, using the SET XACT_ABORT ON statement with Auto-Commit Transactions only works based on WHEN the error is encountered. For example, what if the runtime error was in the second statement?
SET XACT_ABORT ON
	UPDATE Accounting.BankAccounts
	SET Balance -= 200
	WHERE AcctID = 1

	UPDATE Accounting.BankAccounts
	SET Balance += 2/0
	WHERE AcctID = 2
From the error message, we see that the first statement in the batch executed successfully. However, the second statement in the batch still causes an error. This reduced Jack’s balance to $100, but Diane’s was not updated.

Creating Explicit Transactions without Error Handling
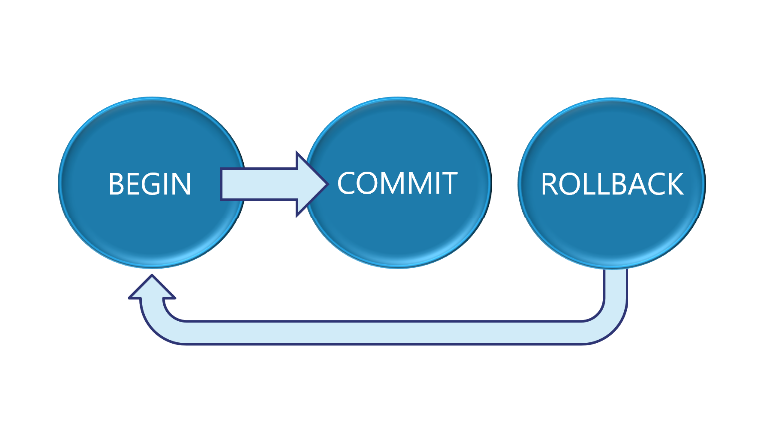
To ensure that either both statements are successful or neither statement completes, we will create an Explicit Transaction. This is done by using the Begin Transaction and Commit Transaction statements. This will tie both statements together into a single transaction.
	BEGIN TRANSACTION
		UPDATE Accounting.BankAccounts
		SET Balance -= 200
		WHERE AcctID = 1

		UPDATE Accounting.BankAccounts
		SET Balance += 2/0
		WHERE AcctID = 2
	COMMIT TRANSACTION
However, when we run this code, we still get the same message. This is because we have not provided any way to handle the error.

Using SET XACT_ABORT ON with Explicit Transactions
If we use both the SET XACT_ABORT ON with an Explicit Transaction, this will terminate the entire transaction. It will not matter when or where the error is encountered.
SET XACT_ABORT ON
BEGIN TRANSACTION
	UPDATE Accounting.BankAccounts
	SET Balance -= 200
	WHERE AcctID = 1

	UPDATE Accounting.BankAccounts
	SET Balance += 2/0
	WHERE AcctID = 2
COMMIT TRANSACTION
However, we still get the same error message as before that 1 row was affected. But if we check the bank balances, notice neither account was updated. This is because the error handling rolled back the entire transaction, including the first update.

Using the TRY/CATCH Statements for Error Handling
To provide better error messaging and control, we can use TRY/CATCH statements. We use the Begin Try and End Try statements around the code we would like to run.
If there are not any errors, the code will run successfully. If there are errors, our code will be sent immediately to the Begin Catch and End Catch block of code to be handled appropriately.
Notice we have also indented the code to make it easier to see where the error handling and transaction statements end and begin. (For those familiar with .NET language, SQL does not include a FINALLY block with its error handling.)
BEGIN TRY
	BEGIN TRANSACTION
		UPDATE Accounting.BankAccounts
		SET Balance -= 2/0
		WHERE AcctID = 1

		UPDATE Accounting.BankAccounts
		SET Balance += 200
		WHERE AcctID = 2
	COMMIT TRANSACTION
	PRINT 'Transaction Successful'
END TRY
BEGIN CATCH
	IF ERROR_NUMBER() = 8134
	BEGIN
		ROLLBACK TRANSACTION
		PRINT 'Divide by Zero Error. Error Number:' +
		CAST(ERROR_Number() as char(4))
	END
END CATCH
When we TRY to run this code, an error is caught and thrown into the catch section to be handled. In the CATCH section we used the Rollback Transaction statement to undo the entire transaction.

The message above shows that the first UPDATE ran (1 row affected). But was then rolled back to the beginning of the transaction (0 rows affected). Neither account was modified.

What are IMPLICIT TRANSACTIONS?
By using transactions, we ensure that our data stays consistent. Another way of turning on transactions is by using the SET IMPLICT_TRANSACTION ON statement. This would implicitly turn on transactions as soon as the first statement runs without having to use the Begin Transaction statement. However, it will not finish until an explicit Commit Transaction or Rollback Transaction is reached. For better control and readability, it is still best practice to use Explicit Transactions with the Begin Transaction statement.
You can find out more on SQL Server Transactions and Data Integrity Basics and Transaction Isolation Levels in my performance tuning section.


Be the first to comment on "Transactions and Errors"