
For this demonstration we will use the HR.Employees table that we created in the post on Table Constraints. Here is a sample of that code.
CREATE SCHEMA HR AUTHORIZATION dbo
CREATE TABLE HR.Employees
(EmpID int IDENTITY PRIMARY KEY,
 FirstName varchar(15) NOT NULL,
 LastName varchar(20) NOT NULL,
 JobTitle varchar(10) NOT NULL,
 HireDate date DEFAULT GETDATE(),
 BirthDate date NULL,
 PhoneNumber varchar(15) UNIQUE,
 DeptCode tinyint)
GO
Using the INSERT Statement to Add one Row
We will begin with just a simple INSERT statement that will add one row into the table. First you may notice that we are not including a value for the EmpID field. This is because it is an IDENTITY column which will automatically supply a value into that field.
INSERT HR.Employees
VALUES ('John', 'Deardurff', 'MCT',
	    DEFAULT, NULL, '555-876-5309', 2)
We then supplied character data into the FirstName, LastName, and JobTitle fields. When we created the table, the HireDate field was supplied with a DEFAULT constraint. We need to use the DEFAULT keyword that will supply the current date into that field.
The BirthDate field allows for a NULL value and for now we will use the NULL statement for that field. Finally, we insert the values for the phone number and department code fields.
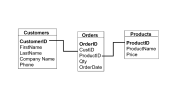
Foreign Key Constraints
A side note here, in a separate blog post when we were creating constraints on the HR.Employees table, we added a FOREIGN KEY constraint on the DeptCode field that enforced referential integrity with the HR.Departments table. If we tried to INSERT a value into the DeptCode field that did not have a matching value in the DeptID field of the HR.Departments table, you would get an error message like the following.

Using INSERT…INTO Statements
Another way of writing the INSERT statement is to include the optional INTO statement. You can also optionally include the column name list as well.
INSERT INTO HR.Employees
VALUES ('John', 'Deardurff', 'MCT',
	    DEFAULT, NULL, '555-876-5309', 2)
Legacy INSERT Syntax
Prior to SQL Server 2008 one would have needed to write a separate INSERT statement for every single record we wanted to add. However, now we can construct several rows all in a single INSERT statement. (For the purpose of this example we will go back to not using the INTO or column name list with our INSERT statement.)
INSERT INTO HR.Employees
VALUES ('Bjorn', 'Wilde', 'Sales',
	    '20080517', '19800617', '555-876-5311', 3),
	   ('Robert', 'Builder', 'Marketing',
	    '20070308', '19830820', '555-867-5012', 4),
	   ('Jane', 'Jetson', 'Sales',
	    '20020407', '20761111', '555-867-5013', 3)
With this statement, we added three more rows to the table. In addition, instead of using the DEFAULT and NULL keywords we supplied date values for the appropriate fields. At the end of inserting these records, we can run the following SELECT statement to display the records in our table.
SELECT FirstName, LastName, JobTitle, HireDate,
	BirthDate, PhoneNumber, DeptCode
FROM HR.Employees


Be the first to comment on "Using the INSERT Statement"